Thursday, November 10, 2011

Pics and Posts

So much to share and such little blog space. I was thinking of hosting a photo party with all the things I have been up to since my last post. I will try to break from the norm and have less waffling and more projects.

Firstly, I will start with this cutie. It is a little armchair and the pattern was given to me by a friend on swap-bot. The author of this pattern is amazing and she has an even more amazing shop on etsy, amieggs. You can find her over at http://blog.amieggs.com and get prepared for a dose of cuteness. I was amazed at how easy the pattern was to follow and I assure you, there will be more to come.

Too cute huh?

Next project was for a swap on Swap-bot. I had to make something for my partner in the theme of swap-bot so I chose the colours which are white, orange and blue. I really liked how it came out and so I made one for myself using my favorite colours pink and green. The pattern is out of my head and I was not intending it to look star shaped but I actually like the look. I will be making more of these as well.

One for my partner...

... and one for me.

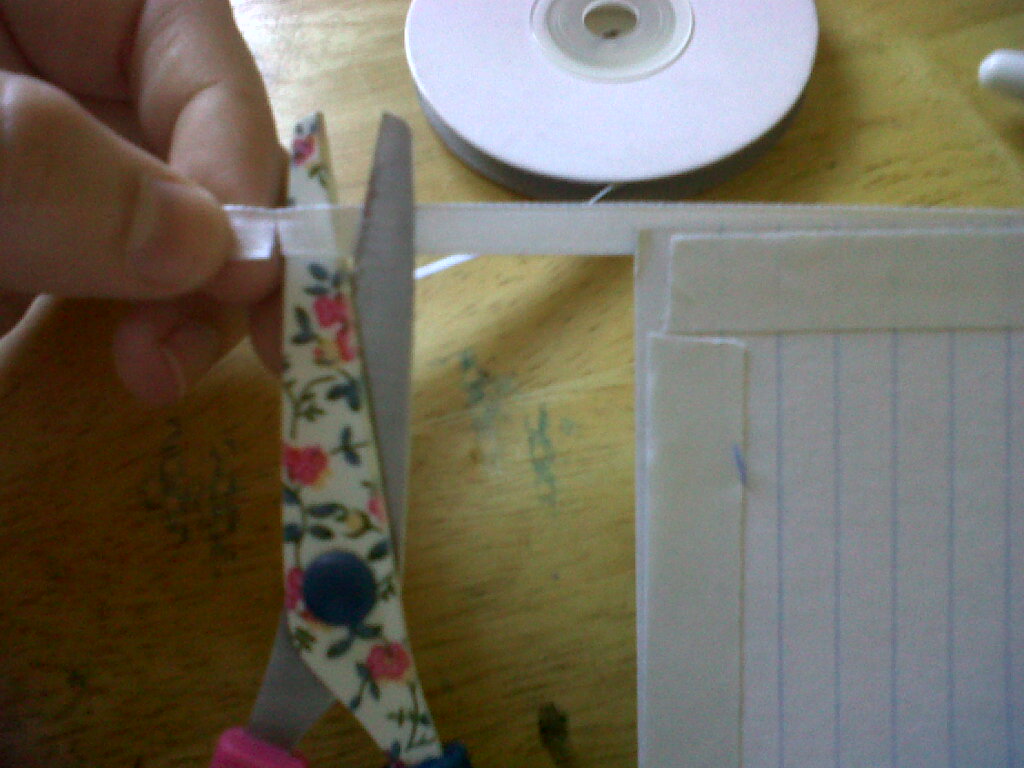
Another project I am working on is a beaded belt. When I was requested to make one I thought to myself "No problem, a few beads on a string. Easy". Well apparently what I had in mind and what they had in mind was two different things and for someone who is not crafty it seems simple enough but when I saw an example of what they wanted I was taken aback. I knew straight away how it was done and what was needed. It is a loom weaving with multiple colours and a pattern that takes some patience. So, instead of sitting around thinking how I am going to get it done, I scrounged for my loom (dusted it off), rummaged out my black perle cotton and rounded up all the beads I could find that suited this project. Before you could say "GO" I was on it. I threaded my loom a few times until I got the tension I needed and without thinking about it I set off. I still have quite a bit to do but I have also gotten off to a good start. I think knowing it is going to someone who really needs it makes the whole thing enjoyable. So far so good and I think this belt might be my defining point in my crafting life.

Went from this...

...to this in a few hours. Still have tons more to go though.

Another project I had on the go in October was the Santa's shoebox and it was amazing. This was an initiative where you signed up to get a gift for a needy child at Christmas. Now I don't celebrate Christmas and try to stay away from the festivities but I am all about kids so my box was not Christmas themed. You get to choose the gender, age and location (from a list of care facilities) and then you fill the box with the child's gender and age in mind. What I really liked was that there were certain items that had to be in the box such as toothpaste,toothbrush, soap, washcloth, something educational, clothing, sweets and then whatever else you wanted. I naturally chose a girl and went wild with the gifts. Everything was pink from the soap dish to the toothbrush to the pajamas. Zanda was a 5 year old girl from the townships and knowing that I helped make her day a little more special, well I get teary eyed thinking about it and just wish I could have seen her face. Even hubby contributed a few things like lip gloss and a purse. This is an amazing charity and I will be doing it again next year for sure.

I forgot to add that I am a first class gift wrapper and I made that bow all by myself.

Lets see, what else have I been up to? Oh, How could I forget my Rocky Horror picture show entourage? Well here they are, the last 3 characters.
Here is Columbia. She was my favorite of the four.  That gold thread was a nightmare though but well worth it in the end. Each has a bit of razzle dazzle in them but she has the most.

I love how Columbia turned out, specially her hat and pink pout

Front view of Columbia
 Magenta. I loved how her hair looked and until I tied it up it was all over the place. I had the song 'She's so mean but I don't care" by Escape club stuck in my head all the time, in particular the words " She's so mean, but I don't care. I love her eyes and and her wild wild hair." Funny enough that is the only line of the song I know but I found it appropriate. Her hair is this fluffy, maroon, sparkly stuff that I had and never used.

A much tamer Magenta with her hair tied.

And one from the front.

Lastly was RiffRaff. I put making him off till the end because I had no idea how I was going to do his jacket and waistcoat. I made his head one day, the hair the next and his legs at the end. The day I packaged it I made his torso and it was not actually so bad. I decided to go simple and just took a deep breath and went with it. His face is really snarky and that was just ideal. His hair was kind of easy to do and not as much work as the others and all in all I think he turned out just right.

Snarky old RiffRaff

And from the front. The pic does not do him any justice as he looks better in real life.

So that was my Rocky Horror picture collection. Individually, I am really not sure but as a unit they work well together. Making them was a really big job and I made one a week for four weeks. I know that sounds really long but I have real life to contend with as well. From my part time job running my husband's boutique to domestic goddess who makes her own bread to part time minder of the neighbors kids to entertaining guests, it is really quite a job juggling all of it and then I always have so many crafts on the go that I am working on so I think four weeks are kind of justified. I really do hope my friend likes them as they are a Christmas present for her daughter. Did I mention they are going to reside in White City, Oregon?

Getting back to that domestic goddess part, I baked my first Red Velvet cake. Given I had never tasted red velvet cake, I think I did a really good job. I do however suggest that they be prepared as cupcakes instead as I had no idea how rich it was. My cake was a huge success and enjoyed by all.  I will wait a while before I try the recipe again because of how rich it is but I really suggest it is a cake well worth it.

The naked cake

Kind of dark photo but the only one I have of it cut.

and another of my dark photo's.

So that concludes my adventure. Busy bee does not even come close to what I was and they should change it to busy N for me. Hopefully my next post will be my completed belt, homemade crystal lollies and a lot less stressful Nasreen. I am sure there are a lot more pics but I will have to save that for another blog adventure so while I get back to my crafting I will leave you with visions of sweet transvestites, humming Escape club and a hankering for cake, till later...Chow!

Saturday, October 22, 2011

Dedication and Delusions

I had an epiphany a few years ago while having a conversation with a friend. It is amusing how we come to a point of self realization when evaluating someone else's situation. At the time she was telling me that she did not have any Friends. I asked her about myself and she said that I knew what I meant. In actual fact I really did because at some point of my teenage years I had the same problem. I think by growing up watching t.v shows like 'Beverly Hills 90210','Melrose place' and 'Friends' we all assumed that there was an amazing group of friend out there that were just waiting for us to join them and make their awesome circle complete. In actual fact we did not realize that we were already part of that group and we did not have the savvy to turn around and re-evaluate the friendships we already had or how much our friendship meant to other people. This made me think about myself a bit more clearly.

You see, how this situation applies to myself is very simple. In my head, I  am amazing at nearly everything, the problem being I just never applied myself to one certain thing. In my head I am an amazing poet, an author unlike any other, an aspiring artist and half a dozen other things. The problem, that I always told myself,  is that I never nurtured any of these "talents" of mine. The source of this delusion goes back, way back to my school days. Every year on my school report there was certain to be one of two things:

A) The fact that I talk way too much in class
and
B) I would do much better in school if I only applied myself better.

While I knew A) was a fact and could never change since it was hereditary (passed down through the woman in my family.....wanna argue Mom?) I never did anything to change it for I knew where my destiny lay in this aspect. But when it comes to B), I was sort of always ashamed at this because I knew I could do so much better so in my head I built up this picture of a person who applied herself  ( I sound like a glue stick) to everything and always tried her best. Now, in a way, thinking back to my earlier school days, I now know that some of my teachers where not the best and while I respect them for what they did, I think they took the fact too lightly that they were the ones responsible for molding us into who we will evidently become one day. I think  the thing they should have done was to pin point the place where I could have applied myself, therefor given me a direction in life and not just a fantasy of being an appliable person ( I just made up that last part so bear with me on this)

Now that you know my background and how I came to this point in my life, I will explain why my friend's situation applied to my life. Instead of musing over what I should have aspired to, I should think about what I can do. Instead of dreaming about being a poet or master artist I think I should evaluate the things that I am good at. Instead of these things, I think I have found something I love and while I do not hold it on the same level as poetry, I think that through my love of crochet and my search of inspiration and pushing the boundaries, I have unknowingly nurtured my love of manipulating yarn into tiny little works of art. A talent I have is that I can replicate a lot of patterns just by looking at them and making my own assumptions as to which stitch was used and how many to get it to look like the item I am viewing. While I never thought this to be something worthwhile, my friends have always admired this and while I love my friends dearly and know they would love anything I made, I never took their admiration too seriously until complete strangers started complimenting me on my work.

I know I sound like I am tooting my own horn but for a person who has always known that she has not aspired to what she wanted or what people expected of her, I myself think it is a feat in it's own right and I am learning to like my new found appreciation for my work and looking forward to finding out what other traits I might excel in if I could only learn to look at them more as talents and not just hobbies. So till next time...Chow!

Saturday, October 8, 2011

It's astounding.

If you read the heading of this post and said to yourself "time is fleeting" then congratulations, you have passed my test. If not then you need to go here and do some homework and please return when you know how to do the timewarp and can at least name half the cast of The Rocky Horror picture show.

For the die hard fans of Rocky horror picture show, it is with great pride that I introduce you to my first RHPS amigurumi and it could be no other than
Dr. Frank-N-Furter.

How sweet is my sweet transvestite?

This project is right up my alley because it gives me an opportunity to use up some fun fur that I had bought but never used.

Let me tell you something about fun fur before I continue. Do not let the name fool you. Sure it seems fun to use this yarn because of the wacky colours and odd ball idea of crocheting with fur but just wait until you drop a stitch and then all hell breaks loose. The only thing that you can really do to find your loop is to undo all your work and start over again. You buy the stuff because it is probably discounted to a third of the original price but once you take it home and get started, you soon realize why it was discounted in the first place. I have a few balls of yarn that were bordering on expensive and I saved for just the right pattern and when the time came, the yarn just did not want to do what I wanted it to so I end up with a all this beautiful yarn that really, I can't to a thing with. Luckily, this RHPS project is just the thing to use up my fury, glittery, sparkly and down right gaudy yarns that never amounted to much. Take the fun fur of Franky's hair for example. I have started so many projects with this yarn which just got tangled and frayed and ended up being trashed but on Franky, it is a match made in heaven.I have an aubergine mohairy yarn perfect for Magenta's hair and a uber sparkly colur for Columbia's hat and bodice.

This project is so much fun that if I have enough time then I was toying with the idea of making a Rocky as well. For now though, Magenta is already in the making and hopefully it will not be long till I get to blog about her too. I have to go as my fingers are just itching to get back to my crocheting so for now....Chow!

Thursday, September 29, 2011

Dolls and desserts.

It has been really long since my last post and for that I apologize. I hate to use the expression but, life got in the way. I completed my fast of the holy month of Ramadan and just completed all the things that had accumulated during the month. I went from a woman with too much time on her hands to a woman with no time to do anything. As fun as it was, I am only now getting back into the swing of things. Here is what I have been up to since I last blogged.

I made a Frida Kahlo doll for a very dear friend of mine and I really spent a lot of time on it. It was the first time that I tried to do an ami with a chin but I was pleasantly surprised and I had passed the test of a good job, when I am so impressed that it hurt to give away.
Here is Frida
Frida from the front

The face of Frida

Frida from the back
The actual Frida Kahlo.

Pretty cute huh? Well I was really happy with it. I just hope Lori loves her.

Another project I was working on was a Christmas cake/pudding for a friend. This pattern is also out my head and while she had shown me a picture of what she wanted, I  think that I got pretty close. It will be mailed off tomorrow, I am just waiting on confirmation of whether she wants eyes or not on this little ami.


So what is my next project to be? Well, I am working on crocheting a little set and am hoping to blog about each one in a series. A friend of mine wants the cast of Rocky Horror Picture Show , namely Dr.Frankfurter, Columbia, Riff Raff and Magenta. I plan to make one a week for the next 4 weeks. I am getting started on the heads tonight and hopefully will get them all done by the end of October, fingers crossed. Now here is a little fun fact that you might not have known about me, I am a BIG 'ol prude. I blush very easily and tsk tsk at a lot of things. I have made the exception for this project as RHPS was a big favorite of mine as a teenager and possibly because I watched it so long ago that I probably cannot even remember what was so controversial about it and the main reason being that the soundtrack was just so awesome. Stay tuned to see how they work out.

For those of you in the Cape Town area, I just want to let you all know that tomorrow is the night market at the Labia theater in the Gardens area. I will be there with my mompom to support a friend of mine who writes the awesome blog Zoesemasekoek, check it out because she is really talented and really funny. Oh and I am dying to try some of her baked goods on sale.

There is so much more going on and I could write forever so I have to cut myself off and love ya and leave. So for now... Chow!

Tuesday, August 2, 2011

Felt and Fasting

I have not written for quite a while and for those of you who do not know, we have entered the holy month of Ramadan so things are a bit hectic as of late. My schedule is jam packed and every bit of time I get has to be utilized. Late nights and early morning leave very little time for crafting and just about everything else. I have however got some free time today to update my blog and let you all know what I have been up to.

Firstly, without further ado I have announce the winner of the altered journal. The winner is.... (drum roll please)... Pippelotjie!
Congratulations, you will be contacted shortly and once I have you colour choices than I can get started on your journal. Thank you to everyone who entered. My Ami will now be called Shirley. I am sure she will love that name.

Good news, today I have reached 1000 views and I am so thankful to everyone who took the time out to stop by.

I have received such great feedback on my tutorial and lo and behold people have commented on how easy it is to understand. That was my only hope and I am glad that I achieved it. Even my mom said that she found it really understandable so thanks mum, my number one fan, I love you to smithereens lol.

As far as crafting, I have made quite some headway on my dolls house and I even got around to making an adorable kitchen sink. I wish I could have put together a tutorial for it because I love how it came out but it was a bit of an experiment so not even I knew how it would look.
Cute huh?I know the photo is a bit dark. It still needs taps too.                 


 A friend of mine found this great tutorial for miniature books and even though mine are not the same (for lack of podge which is still on my shopping list) I still think they are really cute

Miniature books.


I also took some time out to make some adorable felt bottle cap pincushions and I must say that my sewing skills have gotten better. I was so inspired by these photos that I had to try my hand at making them. If you ever decide to go ahead and make some, I would love to see how they turn out and maybe share it here.

As for my contribution well...

A little coffee mug and a cupcake.
2 heart themed pincushions.

 So while I rush off to go do my ever growing to-do list, I wish you farewell and to all my muslim friends and fmily, I wish you well over Ramadan ...Chow!

Friday, July 22, 2011

tutorials and tention

In honour of (or to reach) my nearly 1000 page views I have decided to do a free tutorial on my ribbon woven altered journal. Please note this pattern is my original idea and I have perfected it through trial  and error. You may use it as you wish but if you do re post or publish pictures of  your own journal using these instructions, then please add a link to this original pattern on the blog, I would appreciate it.

One thing you should know before getting started and that is you have to understand tension. Tension in most hand work projects is very important and is something that comes from patience and practice. If your tension is off it can make a big difference in the outcome of your work.In this tutorial I will try to tell you where your tension is most important and hopefully this will help you along. Another thing I suggest is to read though the tutorial first and then go back to follow the steps.

You will need:
  • One A5 journal ( you can make it bigger but for a project like this a smaller book is better.)
  •  Double sided sticky tape
  • craft glue
  • a sharp pair of scissors
  • 3 different colours of ribbon (you can use any amount but 1 colour will make it boring and 3 is an easy colour to start with.)

Here are my tools, I used white as my base colour and
pink and orange for the contrasting.
For my journals I like to choose at least one neutral colour and 2 bright to make the other colours stand out but you can use as many as you like, this is just my preference.

Step one:

On the inside cover of the book, paste 3 strips of double sided tape.
Make sure there are not any pages stuck to the cover. Do the same
on the back cover of the book
Step two:
Put a strip of double sided tape down the spine of the book.
Do not pull any of the backing off just yet


Step three:
Using your base colour, measure your ribbon to the length of the
book from the top to the bottom leaving one inch extra
on both ends.

step four:


Layer the ribbon about 1 inch onto the top strip of double sided
tape.Peel only as much tape as you need. Layer the ribbon next to
each other, as close as you can, all the way across the top of
the inside cover as close as possible
This is how it should look when it is done.

Step Five:

Now starting on the side of the journal, choose your first colour.
Peel off a little of the tape and start layering your first colour.
Measure it to the other side of the book , all the way
around and cut it an inch longer


With your next colour, keep layering all the way to the end.
This is how it should look.only the inside of the front cover  will
be completed in this way. The inside of the back cover should be lined
with just the white ribbon along the top.
step seven:

Peel a little tape and layer about one inch of a new cut piece
of tape over the last piece of ribbon,


step eight:
Lay the book sideways which will be easier to work on.

to make it easier for you, leave the roll of tape inside the cover and
this will slightly elevate the cover and help keep the tape on the
inside from sticking to the pages.


step: nine


choosing one colour, gather up all the strands of that particular
colour and pull them towards you.
step ten:

Pull one strand of the white ribbon down over the pink.Now
is where your tension is important because you have to pull the white
tight, keeping your finger on the top of the white ribbon on
the inside cover. Peel a little of the backing from the tape and secure
the white ribbon in place as close to the edge as possible without
over lapping

step eleven:


on the next layer bring the next piece of white ribbon under the pink and
over the orange ribbon, weaving all the way to the end and secure the
piece on white ribbon onto the double sided tape. Remember to pull it
tight and when you lay it down, lay it right next to the last white piece 
without leaving any space. Secure it.


Use your thumb to keep the ribbon in place while working.


This is how it should look by the second white ribbon.
Step twelve:

This is how it looks when you have finished the first side.
Now we start on the spine of the book.

Peel a little backing away from the tape on the spine.


Close the book and pull the first ribbon tight and layer over the spine
of the book. Repeat this process all the way down the spine  of the
book, keeping your tension the same. If your white is overlapping onto the
spine then just pull the pink ribbon tight while moving the
'weave' into place with your thumb until everything is straight.
This is a side view of the spine. There will be no white in the spine
so try not to let any of the book show through.
 Step thirteen:


Weave the back cover, the same as the front. When you have
put the last white ribbon in place then it is time to secure the colour
ribbon. Pull the ribbon tight and close the book but leaving just enough space
for your finger to fold colour ribbon over
*TIP* remember at school when you had to cover your hardcover books and the paper or plastic was way too tight? Try avoiding the same problem here by closing the book slightly and then fold the ribbon onto the tape and secure, this way everything will be where it should.

Step Fourteen:


This part is optional. You can trim all the excess ribbon off and place a
small piece of tape just in the center , along the edge of the inner cover.
Cut a piece of ribbon long enough to tie the book and secure
it to the piece of tape. Do the same on the other side. This will be used
to tie the book closed although it can be left off.
Step fifteen:

Now using your craft glue, make a small layer of glue around the
edge of the inside cover. I like to put two pieces of double
sided tape in the center. Close the book and the glue will stick to the first page,
concealing all the loose ends.


There you have it. If you followed the instructions properly then
you should have a ribbon woven diary that resembles this one.
Or even this one.

I hope that I have made this easy to understand but please leave a comment if you need any asistance. Thank you for following so till next time...Chow!